

EB5 BLOG
7 DIY No-Carve Pumpkin Decorations
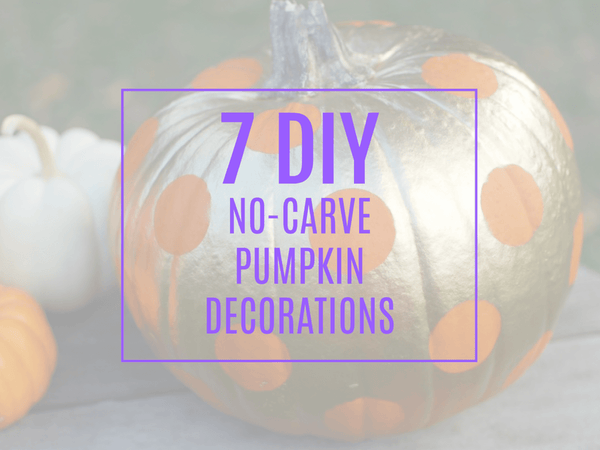
The time between summer and fall is certainly a transition period, and a fun one for the home, at that. Fall and halloween decorations are slowly emerging to welcome the season with open arms, which largely means… pumpkins galore! The pumpkin in its natural state basically only belongs in a warm pumpkin pie. With so many pretty and creative DIY ways to decorate fall’s favorite gourd, there won’t be a plain pumpkin in sight.
To start, paint or spray paint any pumpkin the color you want and you’ll have a working canvas to decorate a number of different ways. If you love the natural orange look of your pumpkin, allow that to be your canvas. Creativity is key, but here are some ideas to get you inspired!
1. PAINT A MONOGRAM
Personalize a pumpkin for you or someone else. This could be the cutest housewarming gift, and a simple one at that. With the bumpy texture of pumpkins, it might help to use a lettering stencil first.

2. USE GLOW-IN-THE-DARK PAINT
With a fabric paint bottle’s precise tip, you can pen all sorts of designs onto a pumpkin. The paint will absorb natural light during the day and really show off when the sun goes down.

3. USE A PUMPKIN AS A FLOWER VASE
Carefully carve the top out and scoop out the flesh and seeds in the pumpkin. Add a little water to the bottom of the pumpkin and add your favorite fresh cut flowers!

4. APPLY ALL THE FRILLS
After painting (or not painting) use Elmer’s glue or a hot glue gun to add all the embellishments you want — buttons, jewels, sequins, appliques, feathers or ribbon. Your nearest craft store is sure to get those creative juices flowing.

5. BREAK OUT THE DRILL
Get in the spirit and carve your pumpkin a different way. Drill holes in an organized pattern and place tealights inside for dainty, fall lanterns. No spooks, here!

6. GLUE AND GLITTER
Using a paintbrush or sponge, apply Elmer’s glue on the pumpkin and shake glitter all over it for sparkly, bright and glamorous fall centerpiece.

7. MELTED CRAYONS
Glue crayons in place at the top of the pumpkin, then use a blow dryer to melt the crayons until the colors drip down the sides of the pumpkin.

We love fall, and we love all of eb5’s anti-aging skincare. Nourish and treat your aging skin by stocking up on your favorites today.


How to Get Rid of Smile Lines
Smile lines (also known as nasolabial folds or laugh lines) are a common sign of aging that can appear around…
Serums 101
You’re not the only one. Serums seem to be the dark horse of the skincare world. We’re here to tell…

5 Ways to Keep Skin Soft and Hydrated During Winter
The weather outside may be frightful, but your skin doesn't have to be. Just follow these 5 tips to keep your…
How to Get Rid of Smile Lines
Smile lines (also known as nasolabial folds or laugh lines) are a common sign of aging that can appear around…
Serums 101
You’re not the only one. Serums seem to be the dark horse of the skincare world. We’re here to tell…
5 Ways to Keep Skin Soft and Hydrated During Winter
The weather outside may be frightful, but your skin doesn't have to be. Just follow these 5 tips to keep your…